Slider – Components
Learning Outcome
On successful completion of this lesson, students will understand how to set up and use the ‘Slider’ function.
Lesson
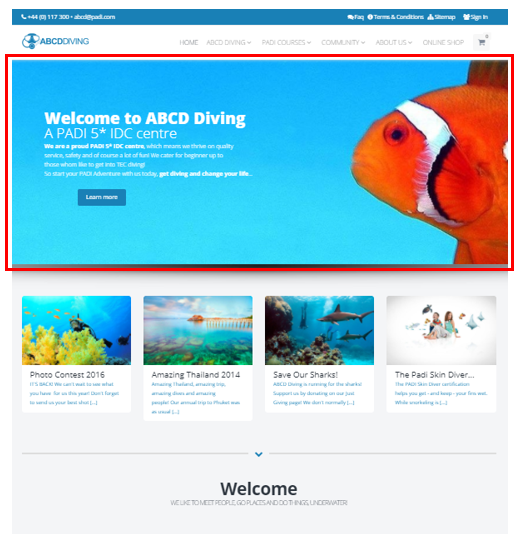
On the home page of your EVE website there is a slider – an image carousel used for a slideshow added into a web page.
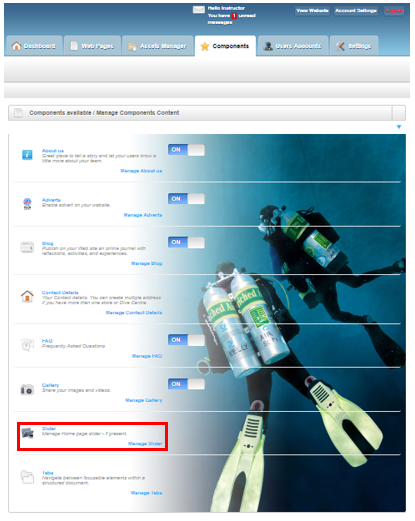
The slider is managed from the ‘Components’ page and to edit the ‘Slider’ you need to click the ‘Manage Slider’ link in the ‘Slider’ section.
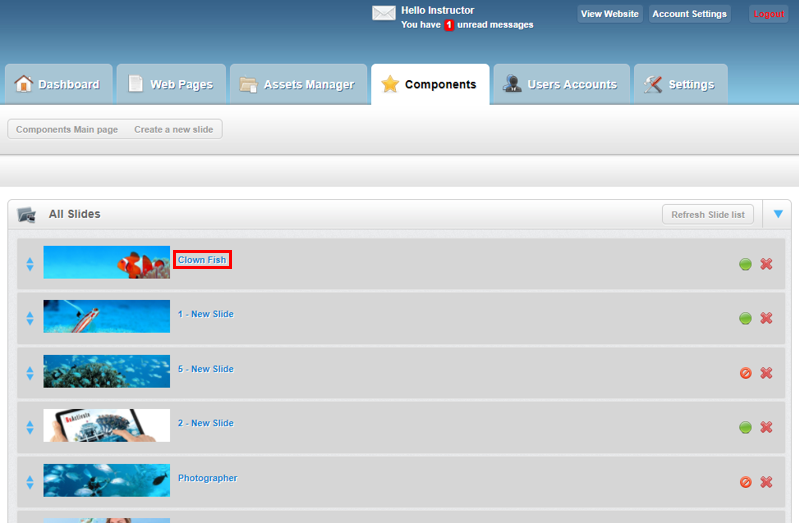
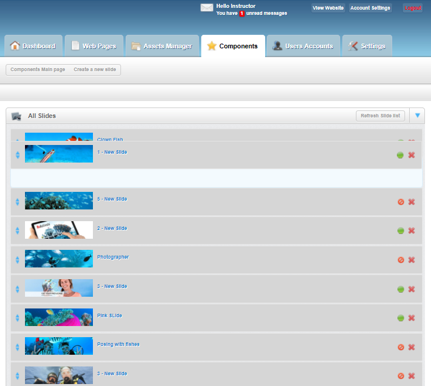
On the sliders page there is a section called ‘All Slides’ which shows the list of slides that are currently available. To edit an existing slide, scroll down in the ‘All Sliders’ section to the slider to be edited and then click on the hyperlink.
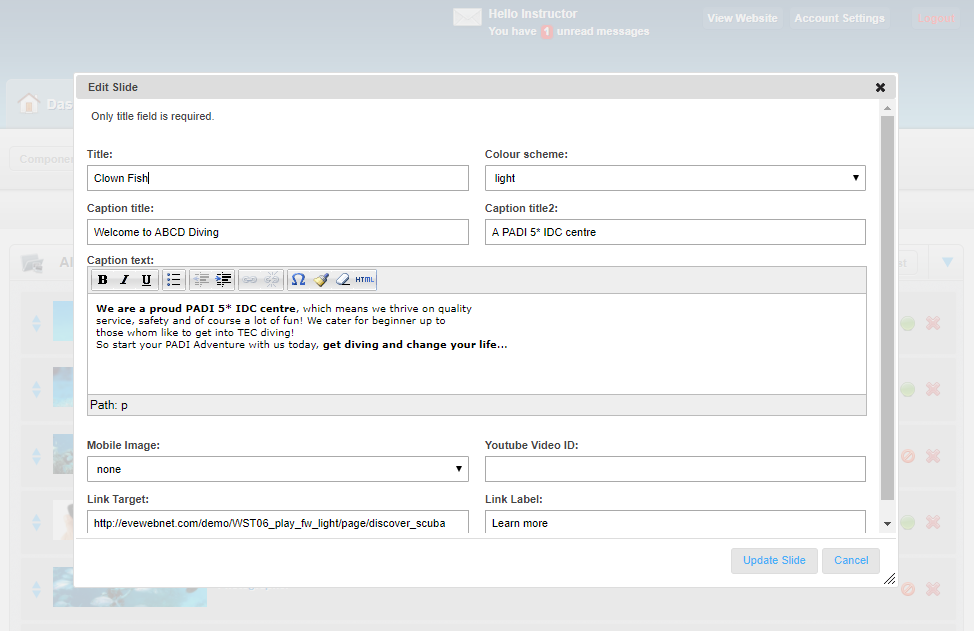
This will bring up the ‘Edit Slide’ window which allows a titles, captions, a call to action (CTA) button with embedded hyperlink and options for a mobile image and embedded video.
The slide ‘Title’, ‘Caption title’ and ‘Caption title2’ can be easily edited by just clicking into the respective text boxes and then modifying the text.
To edit the caption text simply place the cursor into the ‘Caption text’ text box and then you can add or delete text. There is a simple toolbar which provides different functions such as the ability to underline text or make text bold.
It is important to remember that if you have made any changes you must scroll to the bottom of the ‘Edit Slide’ window and then click the ‘Update Slide’ button to save and implement your changes.
The title and caption text are found here on the slider of the home page:
Use the ‘Link Label’ modify the CTA button on a slider image and the ‘Link Target’ is the target URL (where the website visitor is sent when they click the CTA button).
The CTA button is found here on the slider image on the home page:
A video can also be added to a slider image by placing the URL for a YouTube video into ‘YouTube Video ID’.
The Eve website provides the function to have a different image if the website is being viewed on a mobile phone. This is chosen by using the ‘Mobile Image’ drop down box.
For images to be used for the mobile slider, they must be saved by using the Asset Manager and saved into the ‘MOBILESLIDERIMG’ folder.
It is important to remember that if you have made any changes you must scroll to the bottom of the ‘Edit Slide’ window and then click the ‘Update Slide’ button to save and implement your changes.
The order of how the slides are displayed can be changed by clicking and holding down the mouse button on the hyperlink of the slide and dragging it up or down the list to the appropriate position and then releasing the button.
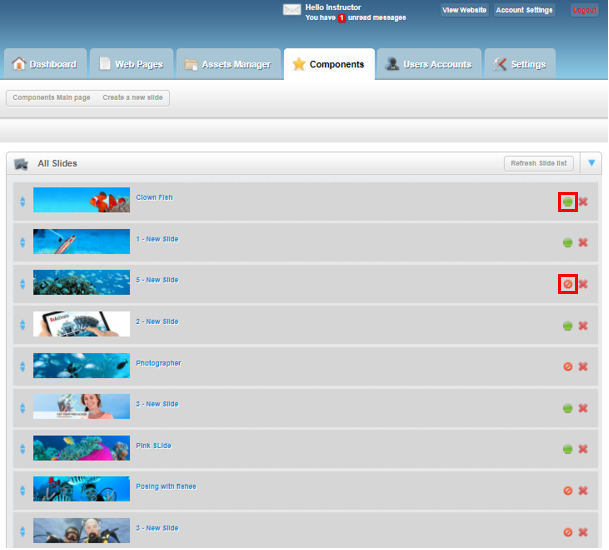
To stop a slide from being displayed on the website click the green icon to change it to a red ‘no entry’ icon and vice versa to show it again.
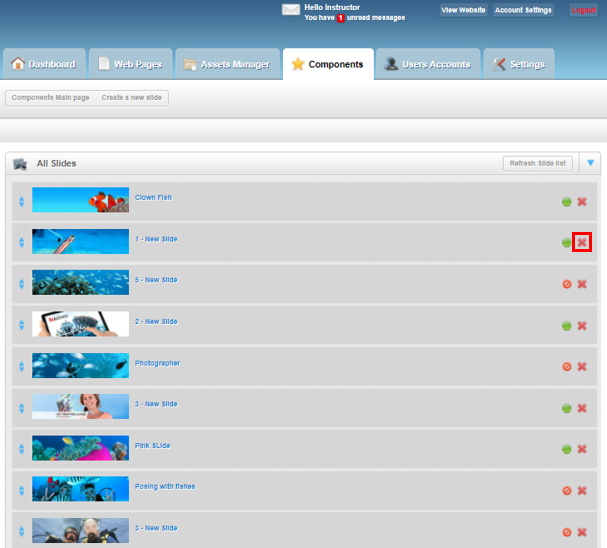
To permanently delete a slide click the ‘Delete’ icon but be aware this action cannot be undone.
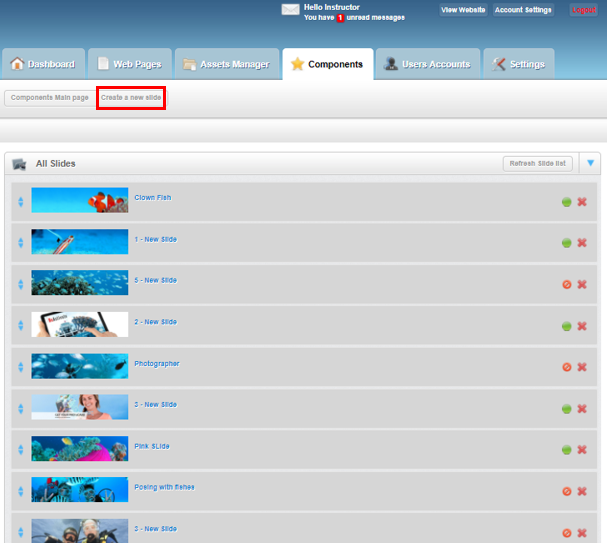
To create a new slider, click on the ‘Create a new slider’ hyperlink:
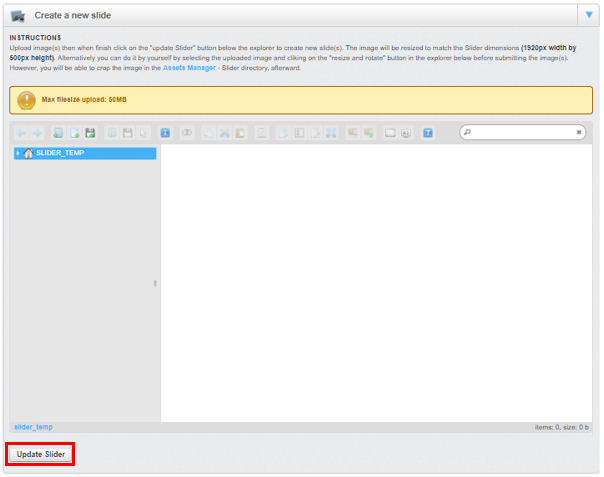
This opens the ‘Create a new slide’ page and you click the ‘Upload files’ icon to upload the desired image. The page also provides instructions about image and file size. It also provides information about how to resize, crop and/or rotate an image.
It is important to remember that if you added a new image you must scroll to the bottom of the ‘Create a new slide’ page and then click the ‘Update Slider’ button to save and implement your changes.

