Blog – Components
Learning Outcome
On successful completion of this lesson, students will understand how to set up and use the ‘Blog’ function.
Lesson
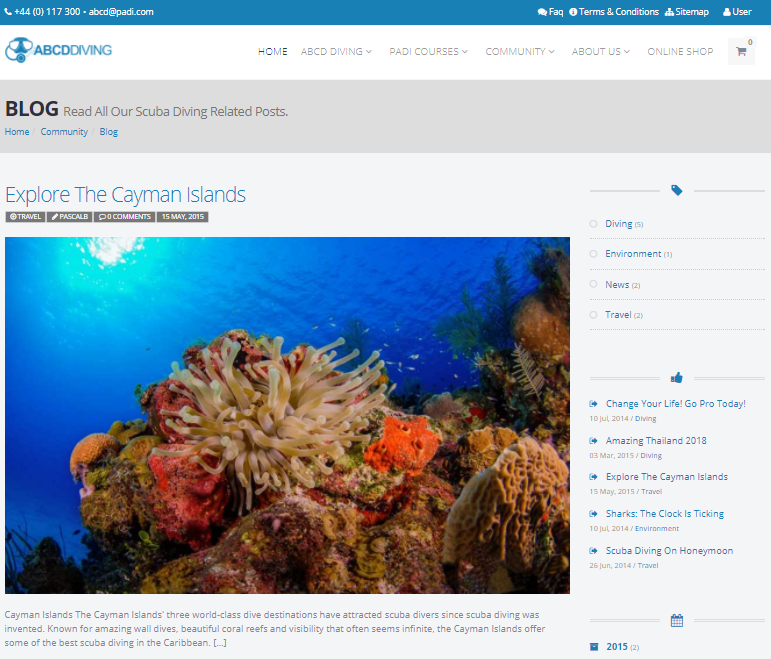
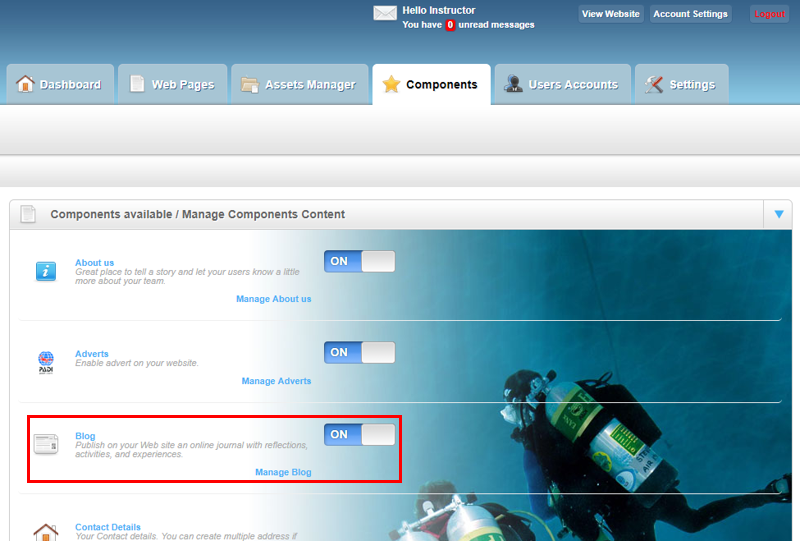
Your website has a blog function and this is managed from the ‘Components’ page in the CMS dashboard. The blog function can be turned ‘ON’ or ‘OFF’ and blog posts are created, edited or deleted by clicking the ‘Manage Blog’ link.
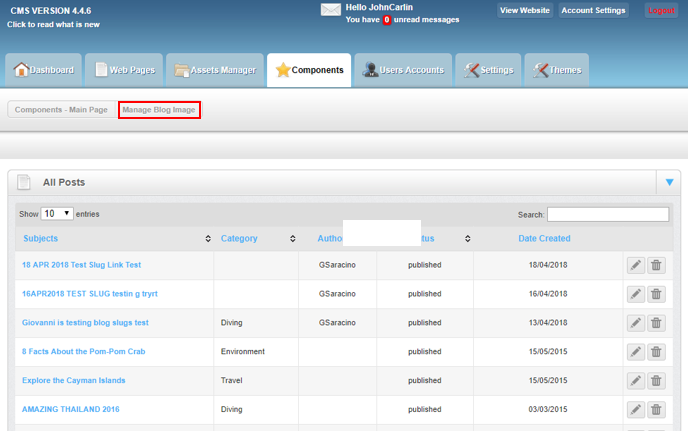
This will take you to the ‘Blog’ page where you can manage your blog images, edit existing blogs, create new blog posts and manage your blog page details.
Manage Blog Images
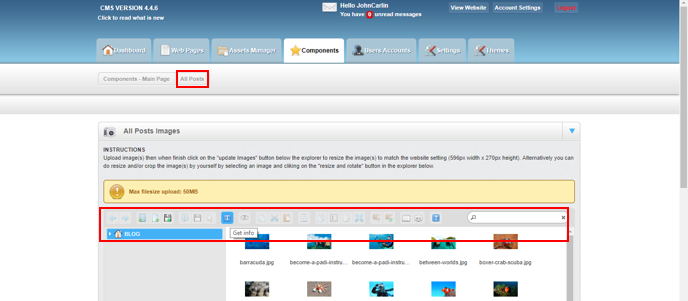
To manage the blog images, on the ‘Blog’ page, click on ‘Manage Blog Image’ link:
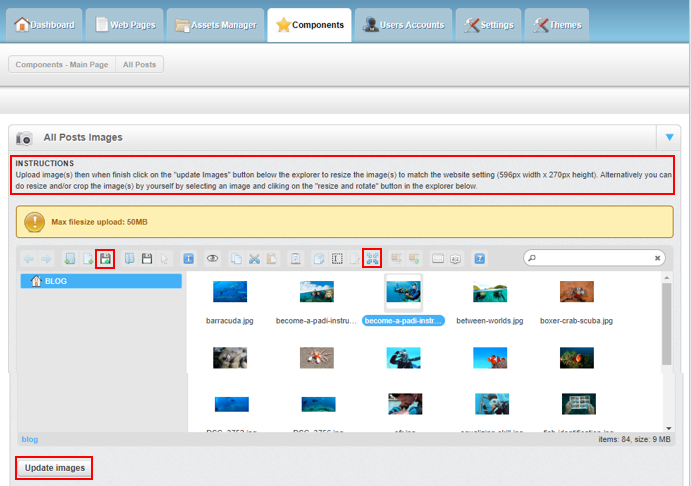
This will open the Blog image ‘Upload’ page. To upload images to be used on your blog, you simply click the ‘Upload files’ icon (disk with a green +) in the toolbar and choose the image you wish to add. On this page you will see the instructions which inform you that when you upload image(s) to resize them (596px width x 270px height) to match your blog correctly you can either:
- When you have finished uploading images click on the ‘Update Images’ button at the left hand corner of the page to resize them
- You can do resize and/or crop the image(s) by yourself by selecting an image and clicking on the ‘Resize & Rotate’ icon (4 blue arrows) in the toolbar:
Once you have uploaded and resized an image for your blog, for editing an image. If you move your cursor over the toolbar, it will show the name/function of each of the toolbar icons. Below is a list of some of the toolbar options/functions:
- ‘Download’ an image file
- ‘Get info’ about the image file
- ‘Preview’ option
- ‘Copy’ and ‘Cut’
- ‘Delete’
- ‘Duplicate’
- ‘Rename’ image file
Once you have finished uploading images and editing any image files, click the ‘All Posts’ link to be taken back to the ‘Blog’ page:
Editing an existing blog post
On the ‘Blog’ page you will see it has three different sections:
- All Posts
- Publish a new Blog Post
- Blog Page details
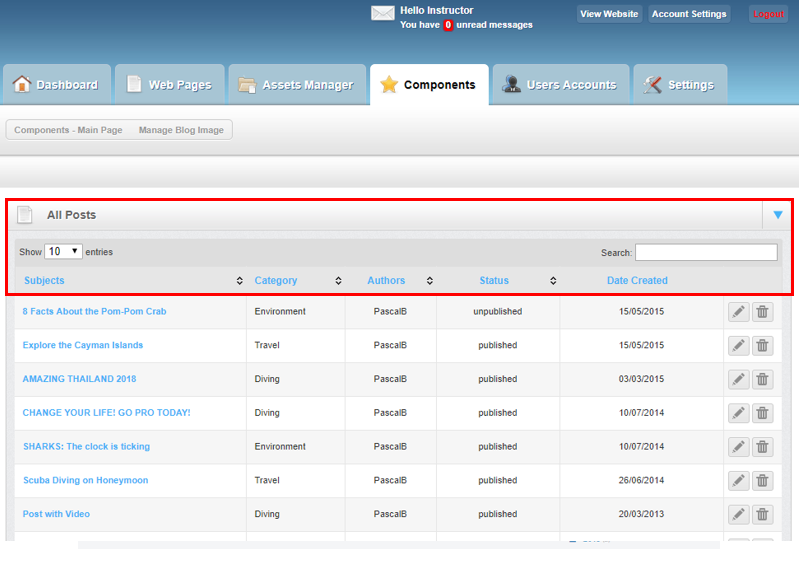
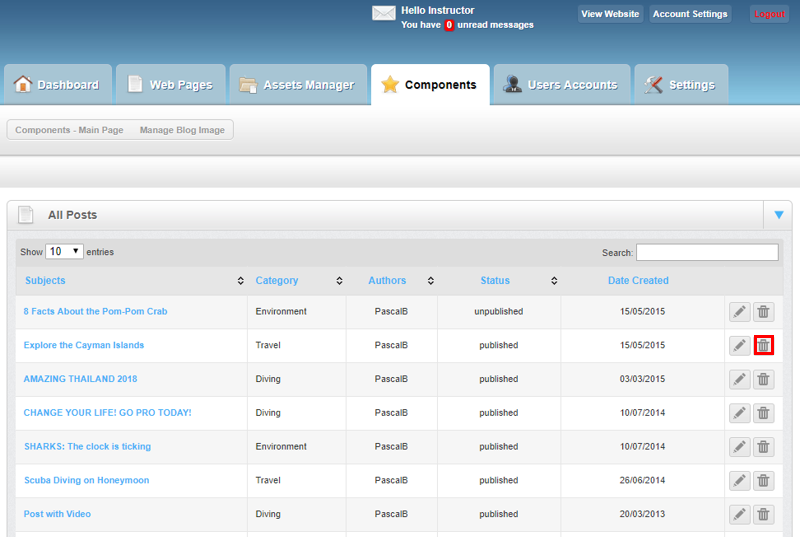
The first section ‘All Posts’ lists all that have been written which can be sorted by clicking on the column headers of:
- Subjects (title of blog post)
- Category
- Authors
- Status (if the post is published or unpublished)
- Date created
There is also a search function where you can type in keywords that appear in the blog post title.
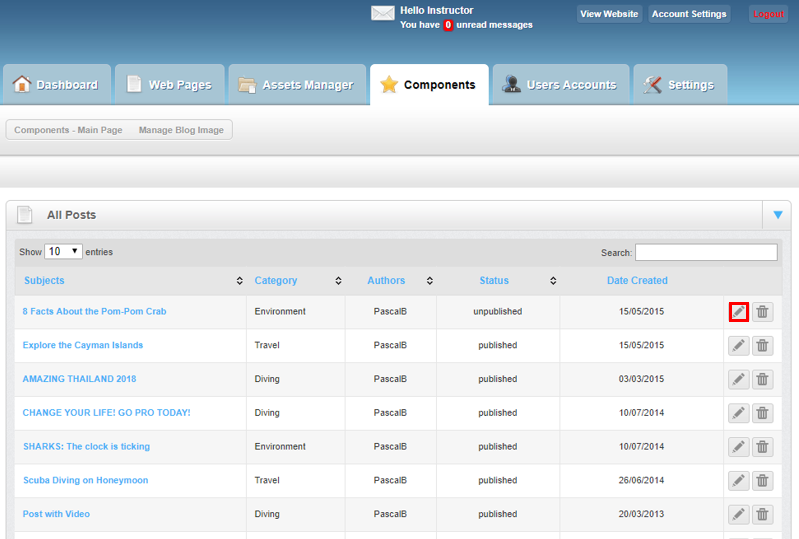
To edit a blog post click on edit icon.
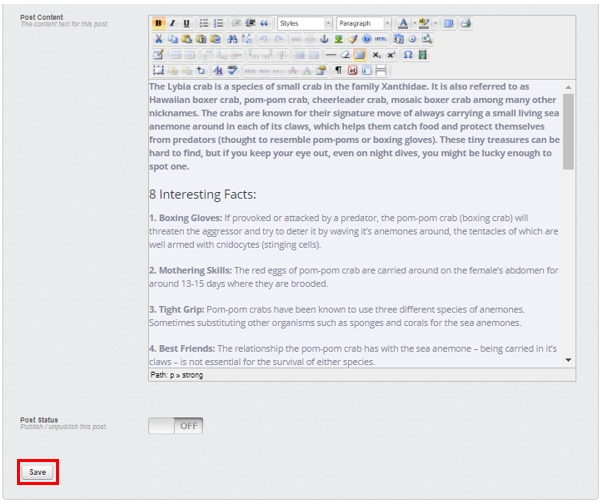
On this page you will then be able to edit the post title, which category the blog post belongs, the main blog post image and add the URL link to a video if required. To edit the text click in the ‘Post Content’ box and then you can add or delete text. There is a simple toolbar which provides different functions such as the ability to underline text or make text bold.
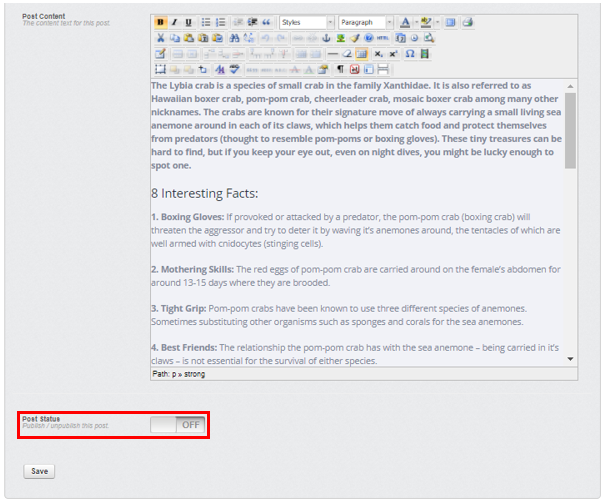
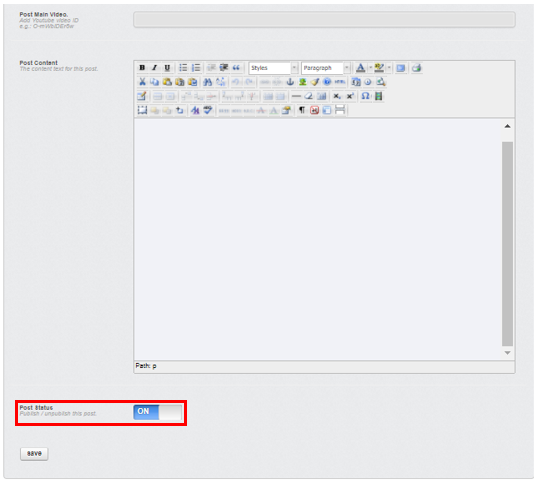
If you wish to temporarily ‘unpublish’ a blog post (perhaps you don’t have time to finish editing the blog post) change the ‘Post Status’ from ON’ to ‘OFF’ and this will save the post as a draft and will not be visible to a website visitor. To make the post visible again change the ‘Post Status’ back to ‘ON’.
Make sure you click the ‘Save’ button to save and implement the changes.
Deleting a blog post
To delete a blog post click trash can icon at the end of the row of the blog post.
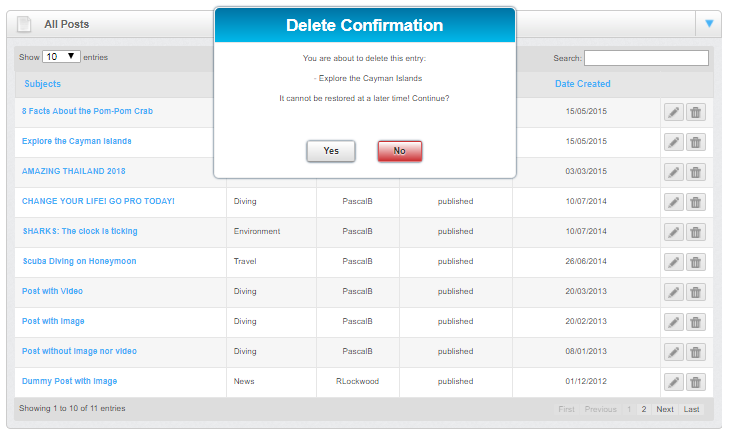
This will bring up the ‘Delete Confirmation’ window – be aware this action cannot be undone. If you are sure you want to delete the blog post click the ‘Yes’ button.
Creating a new blog post
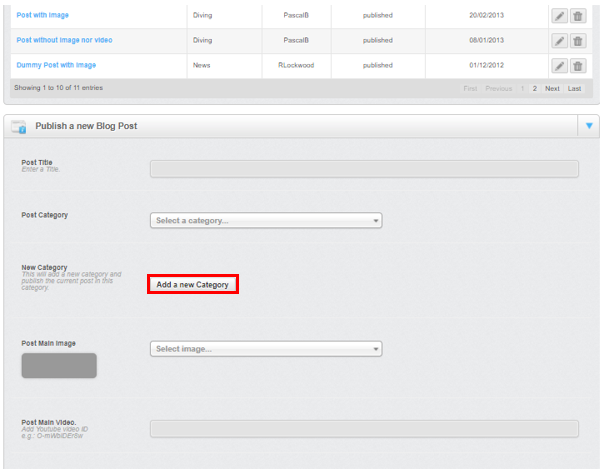
To create a new blog post scroll down to the ‘Publish a Blog Post’ section. To create a new blog post add a title, choose a category for it to appear in and an image. You can also add the link for a video if required. If you wish to add a new category for your blog click the ‘Add a new Category’ button.
To add the text for the main blog page simply place the cursor into the text box and then you can add or delete text. There is a simple toolbar which provides different functions such as the ability to underline text or make text bold.
If you are ready to publish the blog post immediately make sure the ‘Post Status’ is ‘ON’ and click the ‘Save’ button to publish your new blog post.
If you are not ready to publish your post just yet but wish to save it as a draft so you can come back later to finish it, turn the ‘Post Status’ to ‘OFF’ and then click ,the ‘Save’ button. Your blog post will now appear on within the list of ‘All Posts’ with a status of ‘Unpublished’.
Make sure you click the ‘Save’ button to save and implement the changes.
Blog page details
How your main blog page appears on your website is managed using the ‘Blog page details’ section.
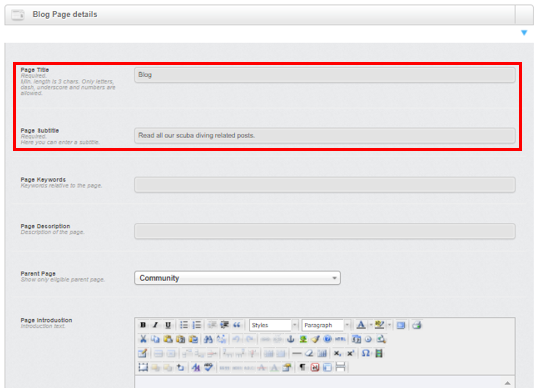
The ‘Page Title’ and ‘Page Subtitle’ can be easily edited by just clicking into the respective text boxes and then modifying the text.
It is important to remember that if you have made any changes you must scroll to the bottom of the ‘Blog page details’ section and then click the ‘Save’ button to save and implement your changes.
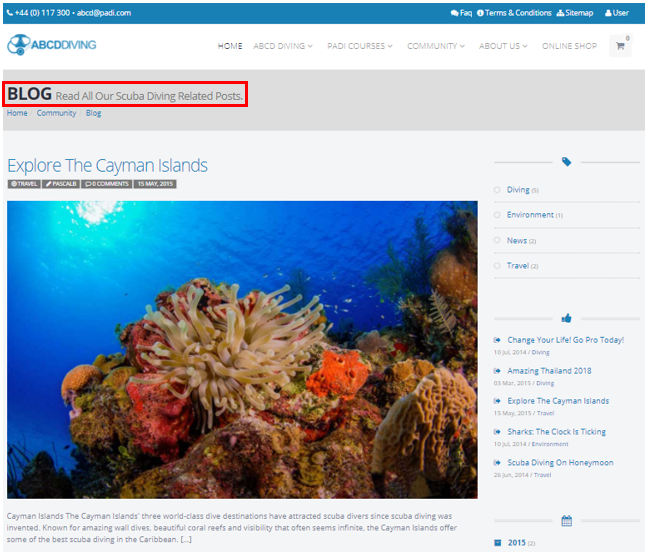
The ‘Page Title’ and ‘Page Subtitle’ are found here on the web page:
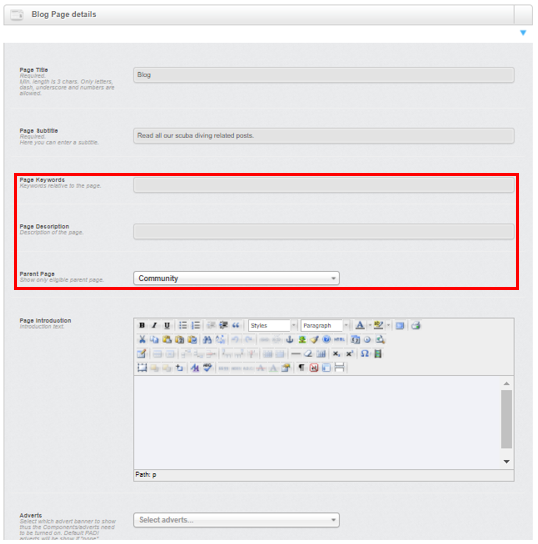
It is important that your main blog page contains the correct words for ‘Page Keywords’ and ‘Page Description’ which are important for your Search Engine Optimisation (SEO).
The ‘Parent Page’ option is used to locate the page within the menu of the website.
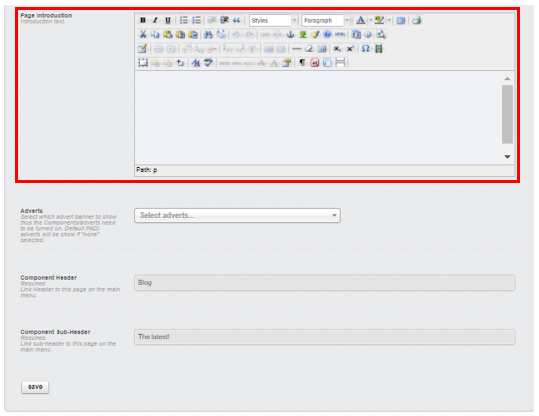
The ‘Page Introduction’ box allows you to manage/edit the introduction text and images on the main blog page.
To edit the text simply place the cursor into the text box and then you can add or delete text. There is a simple toolbar which provides different functions such as the ability to underline text or make text bold.
You may have text content you have already written and saved somewhere else that you wish to add to the blog post. There are two methods to do this which will help to avoid any bizarre formatting errors that can appear.
Editing text – Method 1
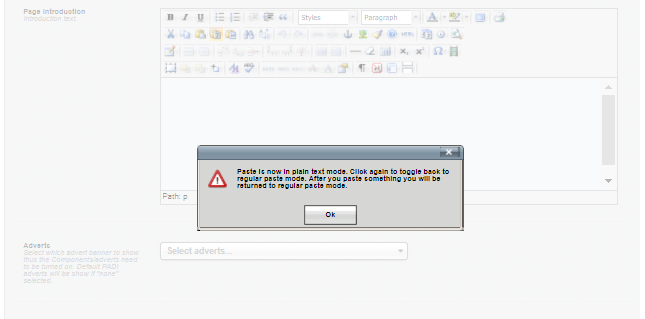
The first method is to use the copy from plain text icon.
- Go to your document where you have your pre-written text and copy the text (highlight the desired text and use the ‘Control’ and ‘C’ buttons)
- Go back to the ‘Page Introduction’ box
- Click the copy from plain text icon
- Place the cursor into the appropriate place and then paste in the text (use the ‘Control’ and ‘V’ buttons)
Editing text – Method 2
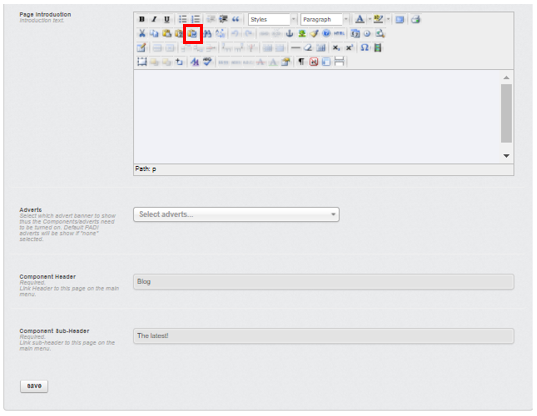
The second method is to use the copy from word icon.
-
- Go to your document where you have your pre-written text and copy the text (highlight the desired text and use the ‘Control’ and ‘C’ buttons)
- Go back to the ‘Introduction’ box and place the cursor in the appropriate place in the textbox
- Click the copy from word icon
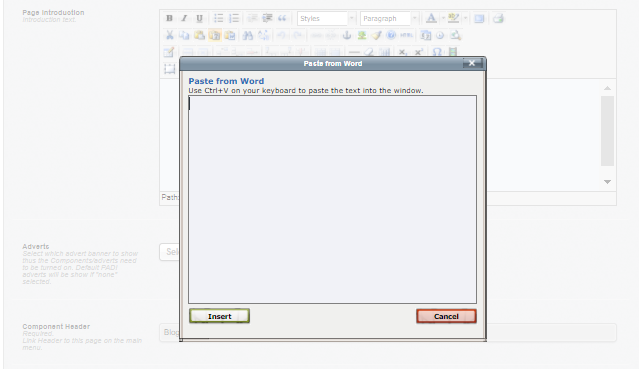
- This will open the ‘Paste from Word’ window. Paste the text (use the ‘Control’ and ‘V’ buttons) into this window and then click ‘Insert’
Adverts
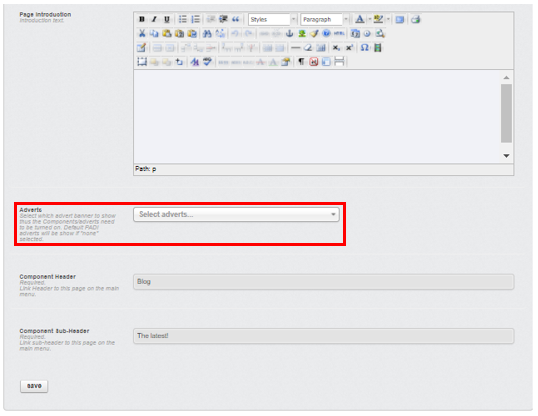
You are able to select which advert banner appears using the drop down box. It is important to note that the default ‘PADI’ advert list (see the ‘Adverts’ lesson for more information) will be shown if another advert hasn’t been selected.
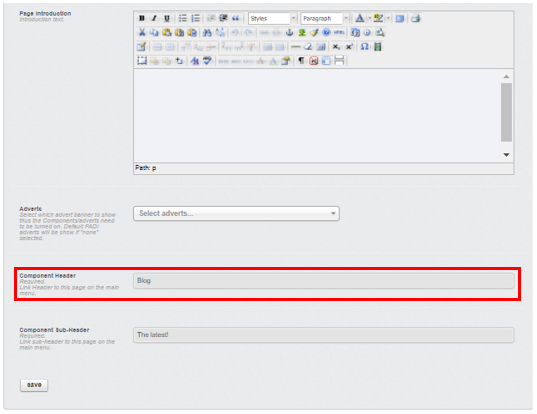
The component header is the link for the main blog page that appears in the main menu.
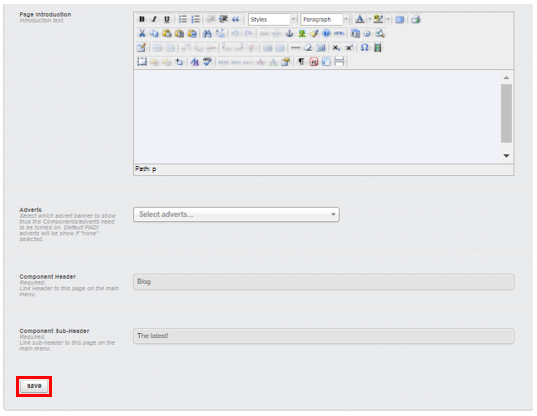
It is important to remember that if you have made any changes you must scroll to the bottom of the ‘Blog page details’ section and then click the ‘Save’ button to save and implement your changes.

