FAQs

c Expand All C Collapse All

Troubleshooting

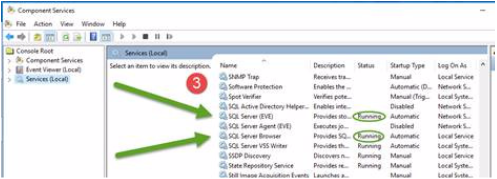
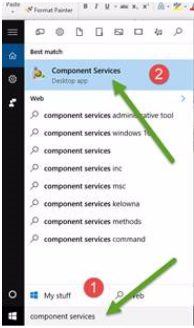
1) Go to the Search the Web and Browser box in the bottom left hand corner of your screen and type Component Services, or as much of it as is needed until it appears in the selection box above.
2) Click on Component Services
FAQTroubleshooting1.1
3) Make sure that SQL Server EVE and SQL Server Browser are both running.
FAQTroubleshooting1.2
4) Reboot PC and go back to this area to check these settings have been retained.
5)Then open EVE and check you can connect to the database.
Category: Troubleshooting
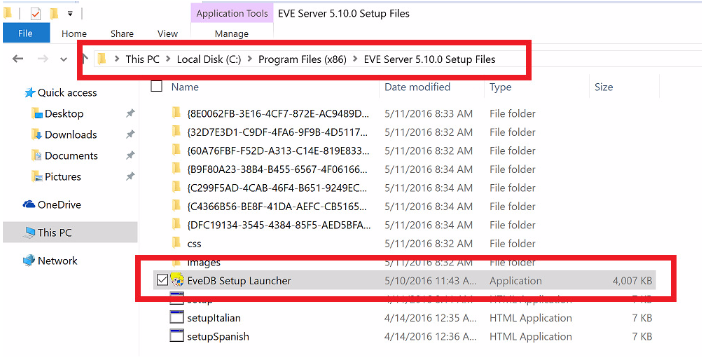
Please go into the following folder:
C:\Program Files (x86)\EVE Serverr 5.10.0 Setup files
and double click on EveDB Setup Launcher – see screenshot below.
FAQTroubleshooting2.1
Category: Troubleshooting
Go to the following folder in My Computer : C:\Program Files (x86)\Integrated Scuba Systems\EVE
(Note: if you don’t have a folder called C:\Program Files (x86), substitute
C:\Program Files in the above).
In that folder, take a copy of the EVEMain.cfg file and keep it safe.
Then, right click on EVEMain.cfg and click Open With -> Notepad
Delete the line that starts: <Config Key="ConnectStringWithoutIS" and replace it with the following line:
i.e. the file should look like the partial screenshot below.
The important thing about the new line is that it contains the following clause:
;Connection Timeout=60
That tells EVE to try to connect to the database for 60 seconds before giving up. Note: without that clause, EVE tries for 15 seconds before giving up and that should be ample in most cases so, if no joy wit this, you need to go back to whoever is providing your connectivity. But let’s try the above first and see if that resolves the issue.
FAQTroubleshooting3.1
Category: Troubleshooting

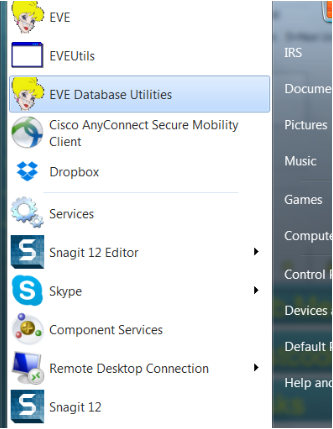
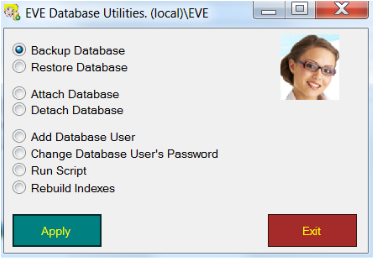
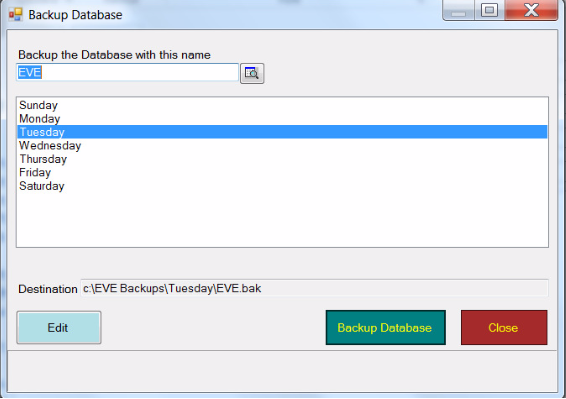
You can backup from the EVE DB Utilities program.

FAQTroubleshooting4.1

Then:

FAQTroubleshooting4.2

Then:

FAQTroubleshooting4.3

Then:

FAQTroubleshooting4.4

You must do this on the PC holding the database.
Then you can copy that .BAK file to an external hard drive, for instance, for safe-keeping.
Category: Troubleshooting
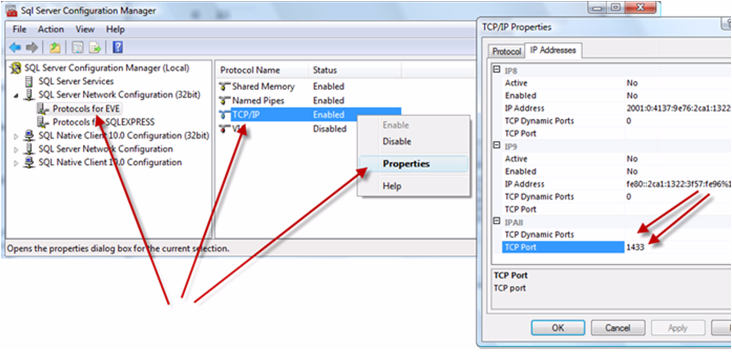
On the server computer, click Start | All Programs | Microsoft SQL Server 2008 R2 | Configuration Tools | SQL Server Configuration Manager
Expand the SQL Server Network Configuration (32bit) section and click on Protocols for EVE.
If you don’t see Protocols for EVE, expand the SQL Server Network Configuration section and look there.
Make sure Named Pipes and TCP/IP are both marked as Enabled. If they’re not, right click on them and then Enable.
Right click on TCP/IP and click Properties Click on the IP Addresses tab and scroll down the list to the bottom.
In the IPAll section, remove the value from TCP Dynamic Port and enter 1433 in the TCP Port
Click OK
FAQTroubleshooting5.1
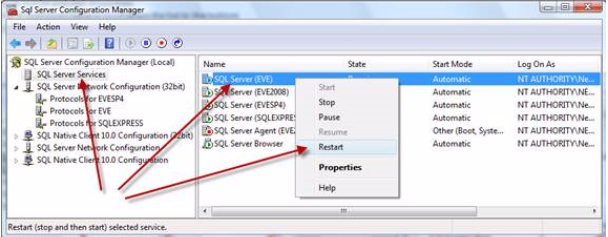
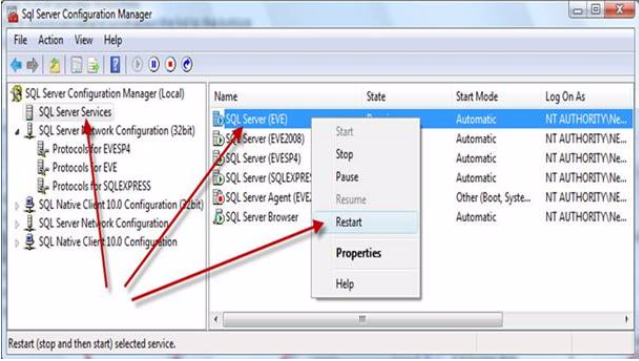
Click on the SQL Server Services entry in the list on the left.
Right click on SQL Server (EVE) and then Restart
FAQTroubleshooting5.2
In Windows Control Panel open Windows Firewall.
Click “Allow a program through Windows Firewall”. (If you don’t see that option, click Advanced Settings and then create 2 Inbound Rules using the details below).
Click the Exceptions tab
Click Add port
In the Name box enter SQL Server Browser.
In the Port number box enter 1434.
Choose UDP.
Click OK.
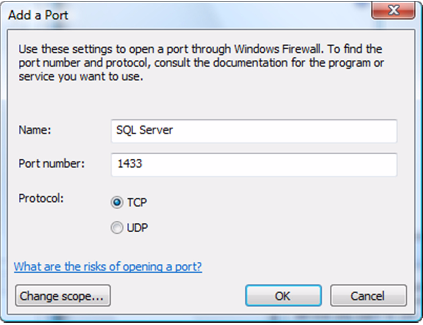
Click Add port again
In the Name box enter SQL Server.
In the Port number box enter 1433.
Choose TCP.
Click OK.
Click OK again.
FAQTroubleshooting5.3 FAQTroubleshooting5.4
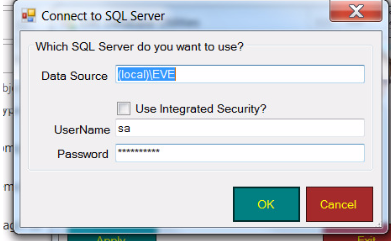
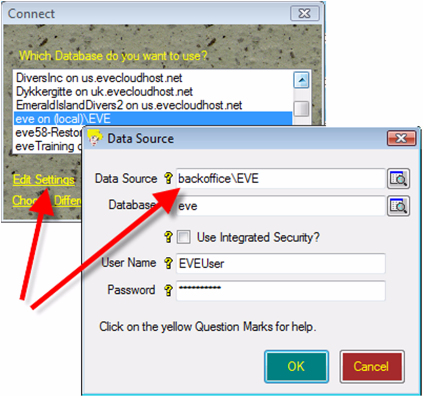
Once all that is done you can tell EVE on the other computers which database to use. i.e. when EVE starts, click on the “eve on (local)\EVE” entry in the Connect list and then click Edit Settings.
Change the Data Source entry to be the name of the computer where the database is installed with an \EVE suffix – e.g. BackOffice\EVE
See screenshot below
FAQTroubleshooting5.5
Category: Troubleshooting

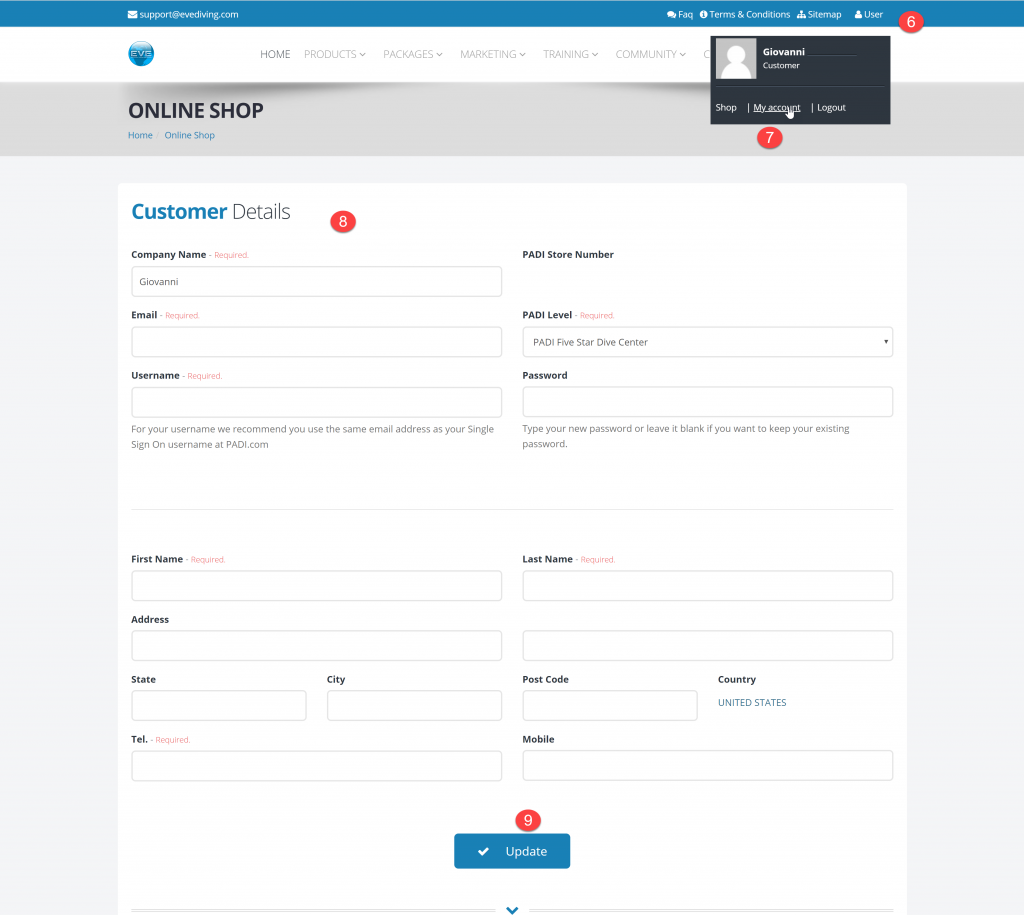
To update your contact details on our evediving.com website  please follow this procedure:

1) Visit our website evediving.com

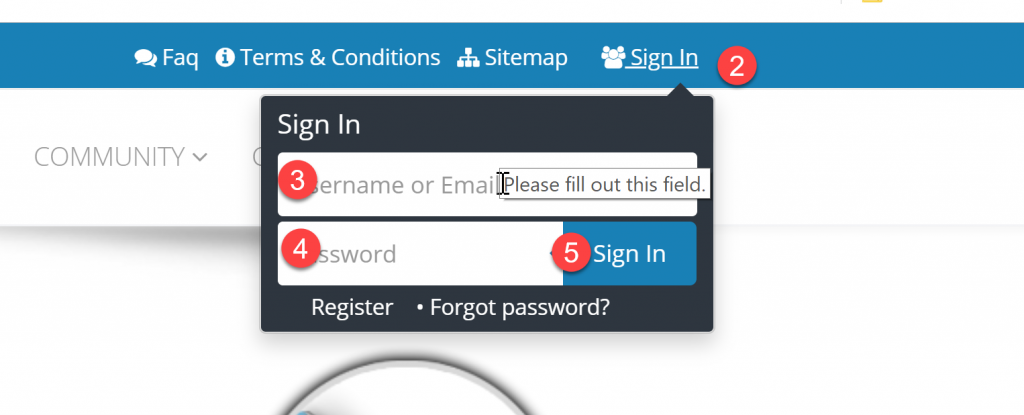
2) Click the Sign In link

3) Type your username

4) Type your password

5) Click the Sign In button

6) Click the User link

7) Click My Account

8) Fill in required fields. Fill in other fields as you see fit

9) Click Update

Category: Troubleshooting

The setup of EVE on your desktop PC requires the installation of 2 components:

  • EVE Server
  • EVE client

In the unlikely case EVE setup wizard fails to install the server component, this tutorial will help you complete the procedure manually.

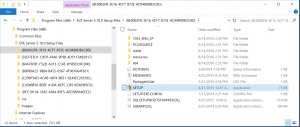
1)  Open Windows Explorer

2) Browse your PC to C:\Program Files (x86)\EVE Server 5.XX Setup Files, where XX represents the value of the EVE version being installed

3) Open the folder named {8E0062FB-3E16-4CF7-872E-AC9489DB2C8D}”

4) Double click on the SETUP file to lauch the installation

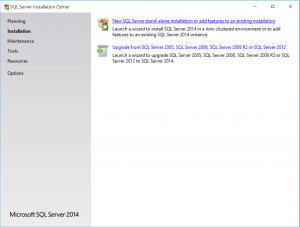
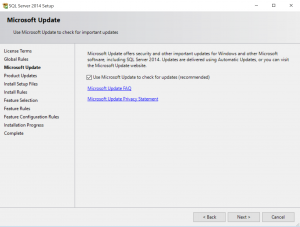
5) Click on New SQL Server stand-alone installation or add features to existing installations

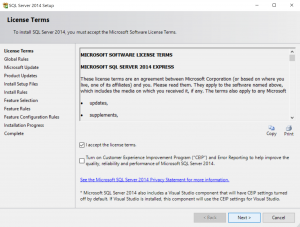
6) Check the I accept the licence terms and click Next

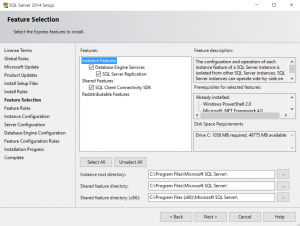
7) Click Next again


8) Check Options and installation folders. Click Next.

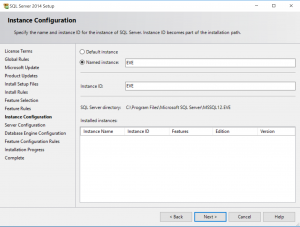
9) Select Named Instance EVE and set Instance ID to EVE. Click Next.

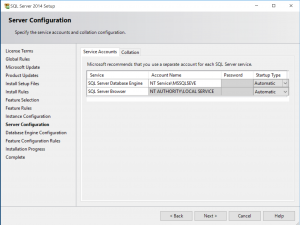
10) Click Next

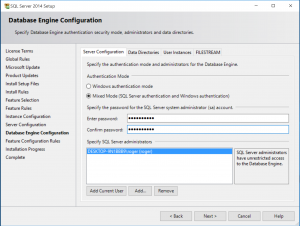
11) Check the Mixed Mode option and enter the password: Dracu1a_99       (Please note the digit 1) and click Next.

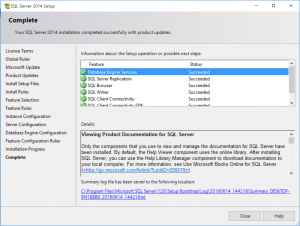
12) The setup is completed. Click Close and launch again EVE Setup Wizard to install EVE Client component

 

Category: Troubleshooting